![]()
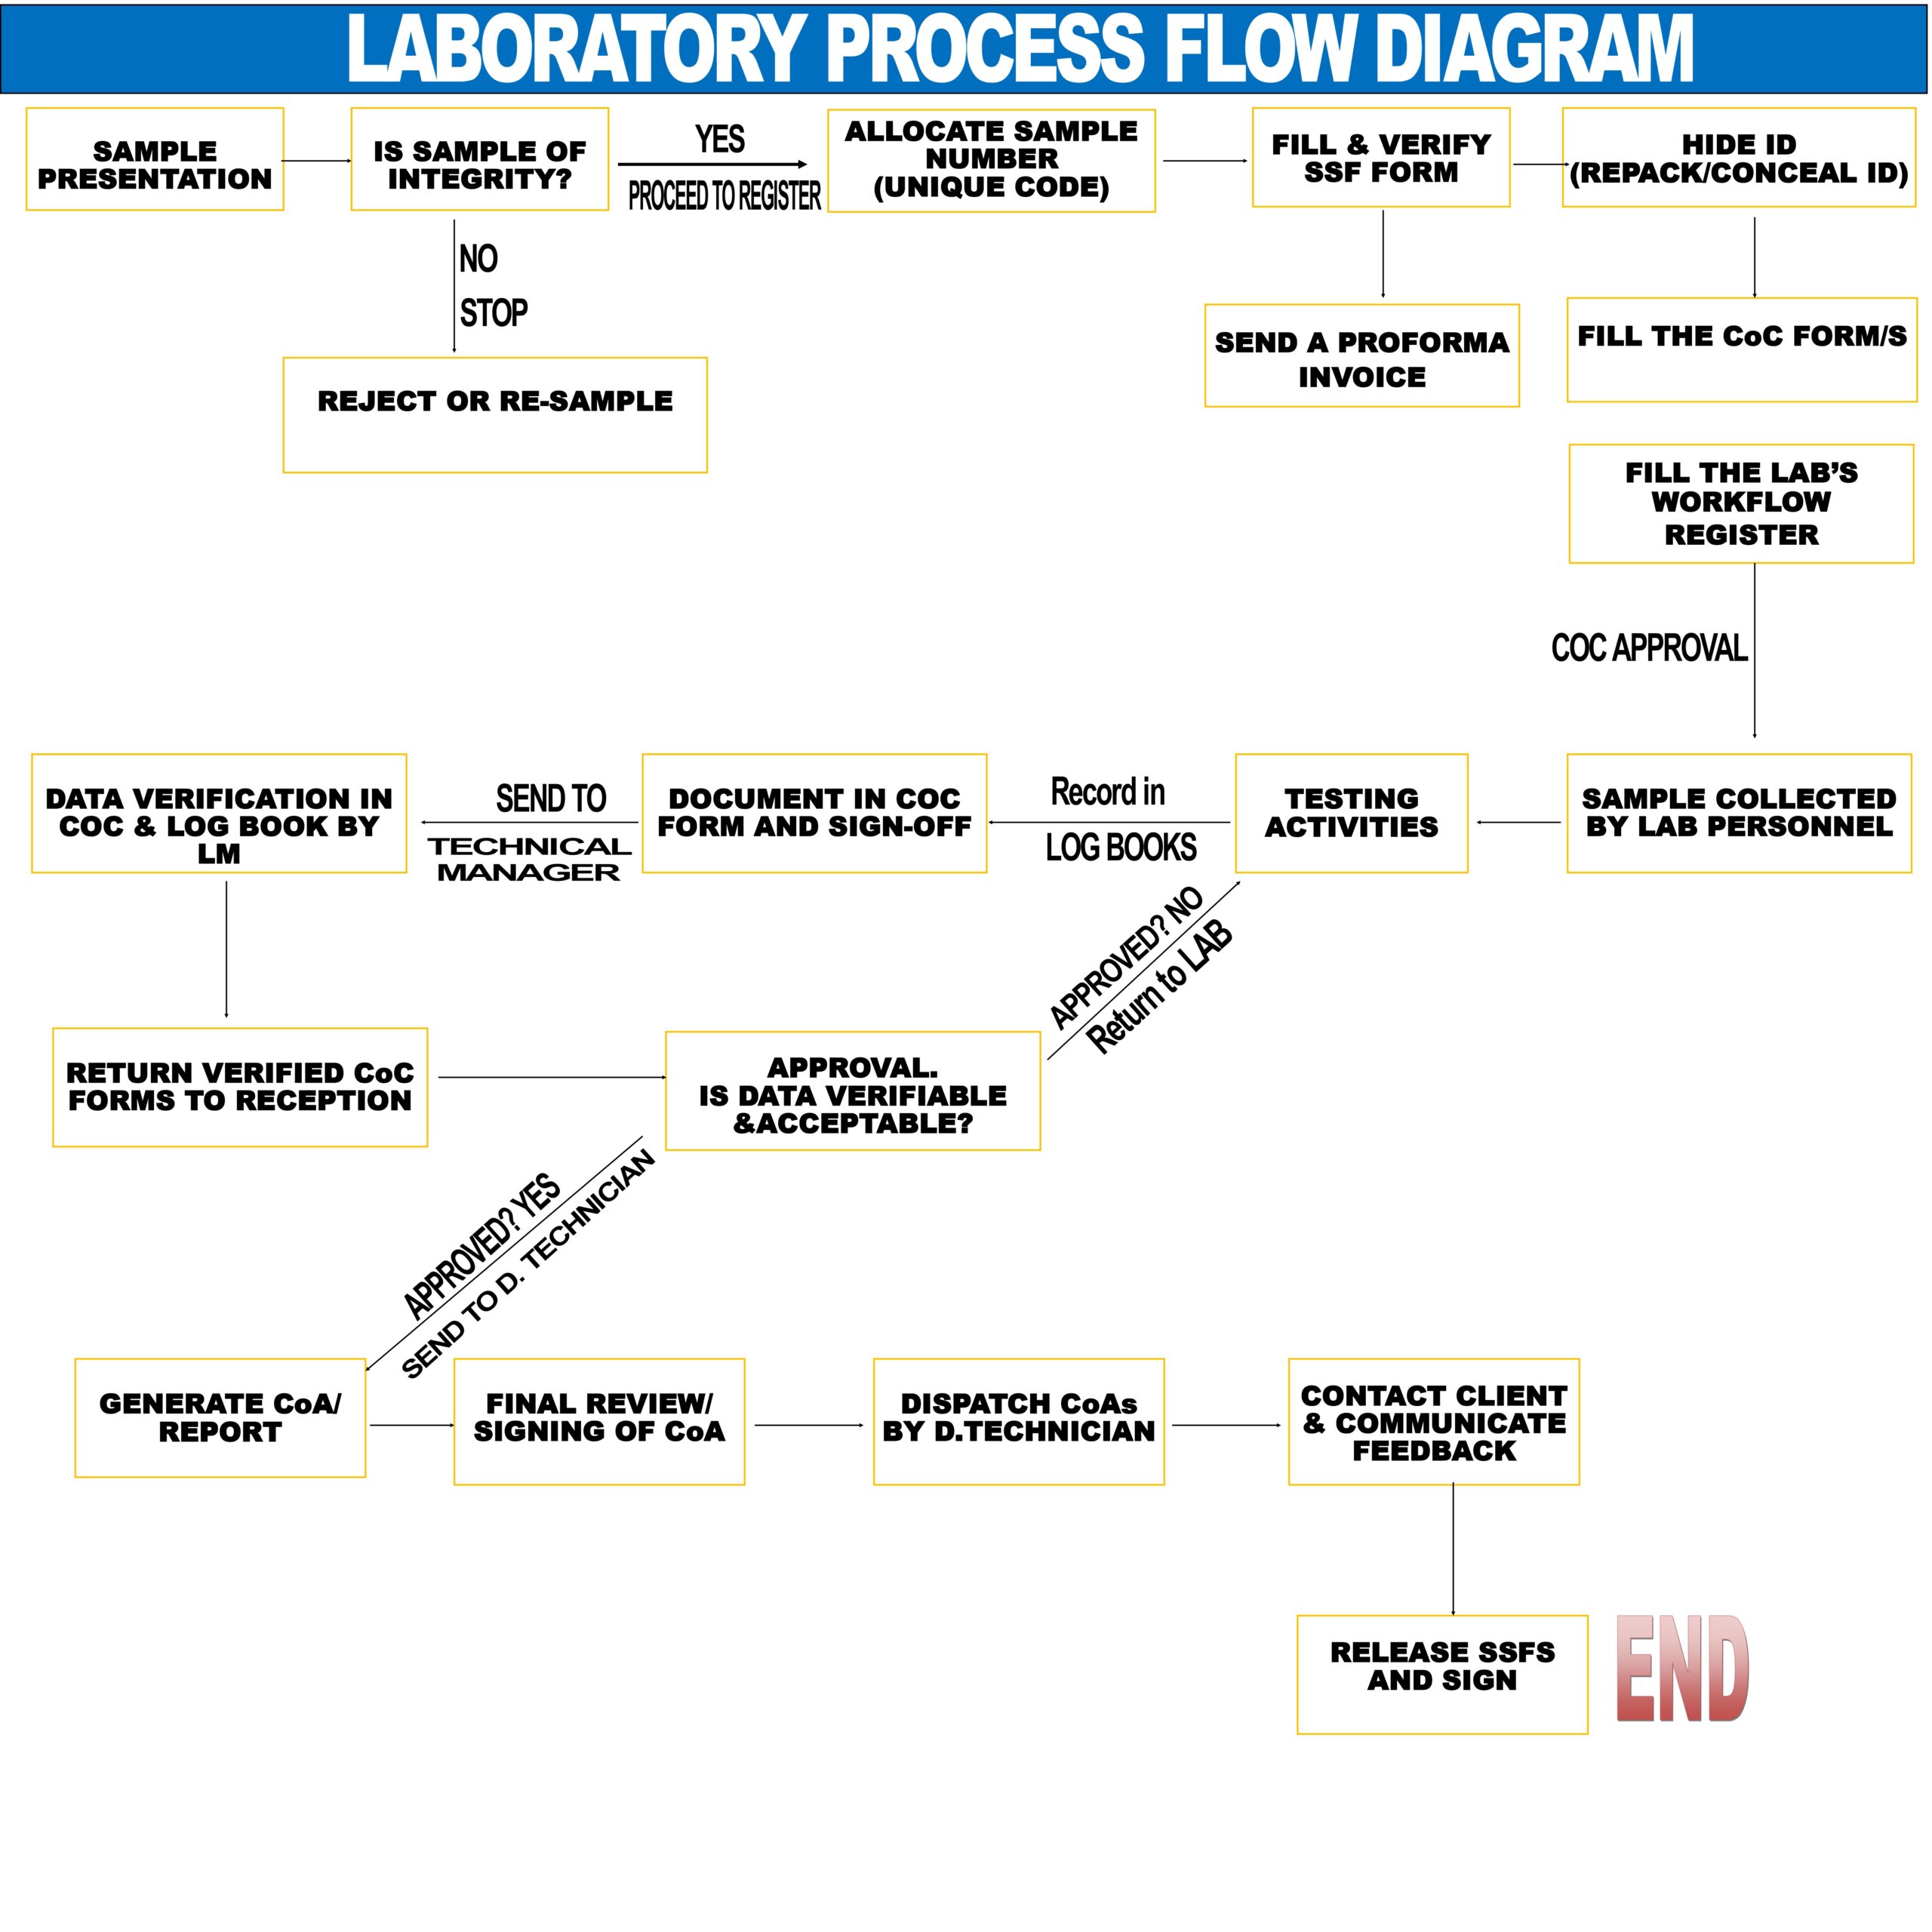
Pictured above is a Laboratory Flow Diagram. A Laboratory Flow Diagram optimizes efficiency, mitigates errors, and enhances output in the sequential progression of procedures in the lab.
As a result, this blog will primarily focus on the significant steps required in streamlining workflow in a microbiology lab.
SEQUENTIAL STEPS:
- SAMPLE COLLECTION, PRESENTATION AND DOCUMENTATION:
The sample is collected from the client, and presented to the sample receiving officer who checks for sample integrity. Is the sample in perfect condition or not? If not in perfect condition it gets rejected. A unique sample number is allocated to a sample in good condition, and sample information then filled in the Sample Submission Form (SSF FORM), and also in the lab’s workflow register.
2. SAMPLE TESTING:
Sample is taken to the lab for analysis, after which results are generated, verified by the lab manager and a Chain of Custody (CoC) form is returned to reception.
3. APPROVAL:
Results data are verified, approved and a Certificate of Analysis (CoA) is generated. Once generated, the certificate is reviewed, signed by the complementary head and dispatched.
4. COMMUNICATION AND FEEDBACK:
Client is contacted by the lab manager for feedback. Feedback; both positive and negative is recorded for future reference. SSFs are then released and signed.
Remarkable results are yielded as a result of an efficiently flowing laboratory process flow.